How to avoid errors during desktop 3D printing
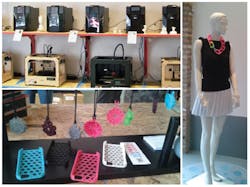
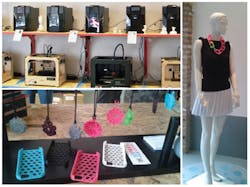
Located in the Whirlpool Building on the Chicago River sits a small shop that helps explain 3D printing to residents and tourists walking about the Windy City.
The 3D Printer Experience LLC houses over 20 printers of various brands and offers services like 3D scanning, 3D printing-on-demand, and scheduled tours and classes. Cofounder Mike Moceri helps teach the workshops. Moceri shared his experience with desktop 3D printers. He says, “My favorites are the UP Mini for its support-material generation and ease of use, the MakerBot Replicator 1 Dual for its versatility and quality, and the SeeMeCNC Rostock Max for its size capabilities and high-speed delta robot mechanisms. However, for the best quality of prints I’ve seen, SLS printing on an EOS Formiga P110 is the gold standard for surface quality, part strength, and dimensional accuracy.” Moceri further explained the desktop-printing process.
Picking the correct material for your prints is an important step to ensure fit, form, and function. Two primary materials for personal 3D printing are acrylonitrile butadiene styrene (ABS) and polylactic acid (PLA). ABS is a petroleum-based plastic that works for applications requiring strength. PLA is a natural corn-based plastic that works well for visual or decorative objects because of its high-resolution capabilities. Regardless of the plastic feedstock, 3D printers should be operated in a ventilated area because the plastic can emit fumes. A paper published in the journal Atmospheric Environment says 3D printers can be classified as “high emitters” with ultrafine particle emission rates greater than 1010 particles/min. From the standpoint of emissions, operating these printers in nonventilated areas is like grilling food on a gas or electric stove at low power.
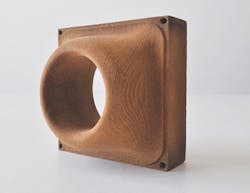
Currently there are several experimental materials on the market such as polyvinyl acetate (PVA), rubber, wood composite, and stone composite. PVA is a water-soluble plastic which makes for a water-soluble material used to make removable supports and patterns for molds. Rubber filaments are used for applications that require soft or flexible parts. Wood-composite material is a mixture of wood pulp and resin that can be sanded or cut like real wood products. Stone composite is a mixture of fine minerals with a polymer binder. It makes stonelike objects that can be sanded and painted. Users should check with the 3D printing machine manufacturer to see if the machine supports these materials.
All machines let users swap materials for different layers. Only dual or trihead desktop machines can print more than one color or material per layer. To do this, the design must be split into different files and then combined in the slicing software. Each file is designated to a tool head and the machine will use the appropriate tool head when instructed during the build.
Design considerations
Most 3D printer manufacturers relate tolerance to the word resolution. A high-resolution 3D printer will most likely specify tolerance in dots per inch (dpi) as the build unit rather than inches. 3D printer manufacturers also use metric units for most of their specifications. Either way, the typical minimum wall thickness for a model is roughly 0.6 mm, and printed part accuracy is ± 0.2 mm.
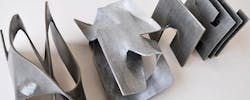
Another design consideration is the support material. A model with large overhang angles will collapse on itself or sag if it is printed without support material. Luckily, support material can be automatically generated in the 3D printing software. The software avoids oversupporting the part and thereby wasting material, but it also lets the user control the angle at which the support will be generated. The recommended support material angle is 10 to 30°.
Keep in mind the underlying problems with the 3D printing world. The same 3D model will produce prints with varying part tolerances when printed on different types and brands of 3D printers. Users need to check the specifications from the machine and material manufacturer and then adjust the model geometries accordingly. Also, with any machine, make sure the printer is calibrated to ensure the resolution will be the same across multiple prints.
Steps to 3D print
Step 1: Prepare the 3D CAD file.
Once you have scanned, designed, or downloaded a 3D model, it’s always a good idea to “clean” the file. A software program called Netfabb checks the validity of the 3D model. In the program, use the automatic repair tools to patch any holes, clean any intersecting polygons, or delete any excessive shells. Export the model to a .STL or .OBJ file.
Step 2: Open the file in the 3D printing software.
The machine’s 3D printing software “slices” the file into 2D layers, or G-code (.gcode), the language the 3D printer uses to control each axis and tool head. In general, the following settings are ideal for printing plastic objects in a finely tuned machine.
• Print speed settings: 90 to 120-mm/sec extrusion speed for interior shells and infill, 200-mm/sec travel rate, 20 mm/sec for outer shells.
• Material settings: 0.2 mm layer height, 15% infill, infill shape set at hexagonal or line.
• Acceleration settings: X/Y axis jerk at 15 mm/sec.
• Print temperature: 230 to 240°C for ABS, 200 to 210°C for PLA
• Layer height: 0.3 mm for fast draft quality, 0.25 mm for medium draft quality, 0.2 mm for standard quality, and 0.1 mm for high quality.
• Bed heat (helps ease the finished part off the bed): 118°C for ABS if using a glass bed or Kapton (polyimide film developed by DuPont) surface, 60 to 70°C for PLA or zero bed heat if using ScotchBlue painter’s tape as a print surface. The tape is available in 6-in. rolls, a width that covers the majority of the bed which eliminates bumps and overlaps from thinner strips of tape.
Step 3: Prepare the machine and print.
Load the appropriate material into the extruder or hot end. Level the bed by placing the print surface 0.1 mm (approximately the thickness of a piece of paper) away from the nozzle at all points around the print bed. Tension all of the belts until a strum sound can be heard.
Use a USB or SD card to upload the sliced .gcode, .x3g, or other type of file into the machine. Select the file on the machine’s user interface or from the connected computer. Hit print.
Step 4: Clean the part and assemble.
For parts that have support material, simply remove the support by chipping it off or dissolving it in the solution provided by the material supplier. If you have parts that need to be glued together, acetone or ABS glue works well for ABS parts because it melts and resolidifies the plastic. Sodium hydroxide works similarly for PLA. In general, Gorilla Glue and superglue can be used for either types of plastics.
The next generation of mold makers
As desktop printer designs evolve, vendors of low-end machines try to match the tight-tolerance capabilities of professional 3D printers. And, as they get closer, desktop enthusiasts are better equipped to print molds. For example, bismuth alloy and other low-melting temperature metals may be poured in ABS molds. Curable materials like clay, chocolate, wax, and gelatin can also set in desktop 3D printed plastic molds.
When it comes to injection molds, professional prints offer the best quality. Stratasys reported the use of its PolyJet 3D printing technology by a team in the Department of Polymer Engineering at Budapest University of Technology and Economics. Led by Dr. Jozsef Gabor Kovács, the team used a professional printer to produce an injection mold for a fan designed to better cool car engines while reducing noise. The team printed the injection mold out of Digital ABS on the Objet500 Connex.
After 22 hr of printing, the mold was used in an Arburg 70-ton injection-molding machine. It was injected with polyoxymethylene (POM), which is a material that cannot be 3D printed, and was hypothesized to be the end-product material. The injection-molding-machine settings included: 30-MPa injection pressure, 10-MPa holding pressure, 8-sec holding time, a clamp force of 150 KN, 65-cc shot size, 30-sec cooling time, and shot temperature of 210°C.
To prolong the mold life, the team let the mold cool to about 55°C before shooting the next cycle. The mold was reported to undergo eight shots and after the eighth shot there was no sign of degradation.
The printing tolerance was about 0.1 mm and the injected parts came out within 0.2âmm tolerance. But this tolerance from a professional printer doesn’t deviate too far from the tolerance produced by a start-up company’s high-resolution desktop printer.
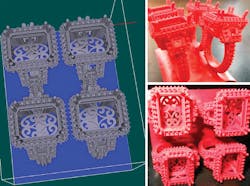
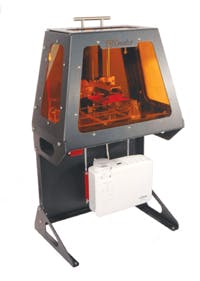
The B9 Creator from B9 Creations LLC is a 3D printer that uses a digital light-processing (DLP) projector to cure a photopolymer resin. The printer was funded on Kickstarter by jewelers and other makers because the machine’s high-resolution capabilities make it a candidate to print patterns for lost-wax castings.
So the desktop 3D printer is yet to print a material suitable for injection molds but the resolution is not far off. The machine prints resolutions in the X/Y plane of 50, 75, or 100 microns depending on the self-adjustment of the projector’s position and focus. What’s more impressive is the step size in the Z axis, which can range from 6.35 to 101.6 microns (0.00635 to 0.10160 mm).
Stratasys’s Objet500 Connex prints a layer thickness on the X/Y plane down to 16 microns (0.016 mm). Stratasys claims the build resolution is 600 dpi on the X axis and Y axis, and 1,600 dpi on the Z axis. If the B9 Creator could get its X/Yâaxis resolution near 16 microns and print a material suitable for injection molds, it would compete with the Objet500 Connex. Then the only difference between a professional and desktop printer would be build size.
At 100 microns, the build area on the B9 Creator is 102.4 × 76.8 × 206.4 mm. At 50 microns, the build area shrinks to 51.2 × 38.4 × 206.4 mm. The Objet500 Connex has a larger net build size of 342 × 342 × 200 mm (13.4 × 13.4 × 7.9 in.).
For more information, visit stratasys.com.
About the Author
Lindsey Frick
Associate Editor
Lindsey has been an Associate Editor for Machine Design since 2012. She holds a Bachelor of Science in mechanical engineering from Cleveland State University. Prior to joining Penton, she worked in product design, packaging, development and strategy, and manufacturing. She covers the materials market and other areas of interest for design engineers such as 3D printing and methods to operate efficiently.
