Authored by: |
What to look out for when sensors get widely dispersed over big machines.
With data-acquisition projects, the costs of delays are often high. That’s particularly true for heavy machinery like cranes, mining shovels, and excavators. Examples come from obstacles commonly faced by engineers measuring strain along the length of a 300-ft crane boom made by Manitowoc Cranes, Manitowoc, Wis. Mark Yeager and Tim Carlier, test engineers for Integrated Test and Measurement (ITM), Milford, Ohio, a service provider (employed by Manitowoc Cranes) specializing in challenging test applications, took these measurements over several weeks.
Choice of strain gage
Strain gages have nearly unlimited variations based on qualities such as size, sensitivity, material-temperature coefficients, temperature ranges, and measurement axis. Pay attention to the strain-gage properties and the material it mounts on. Here, 32 strain gages mount to each lattice section along the entire length of the boom, according to the methods described in SAE J987. Measurements of buckling stresses in the crane boom lattices came from single-axis 350-ˆ strain gages used in a quarter-bridge configuration. In total, ITM used 144 strain gages along the length of the boom.
A strain measurement is essentially a resistance measurement, so lead-wire resistance can cause offsets. Quarter-bridge measurements are inherently sensitive to the resistance of wiring between the sensor and measurement device. So long wire runs on off-highway equipment are a problem. A method called shunt calibration can quantify the leadwire resistance and nullify this effect, either in software as data is acquired or in postprocessing.
Electromagnetic interference
Noise sources like TV and radio stations can affect measurements, necessitating data filters to ensure accuracy. For example, the NI CompactDAQ dataacquisition platform from National Instruments includes integrated signal conditioning such as filtering, amplification, and excitation.
Quarter-bridge measurements
Instrumentation options are limitless. You need to chose hardware that can be optimized for the application. ITM engineers used NI C…Series modules with the NI CompactDAQ platform. Each module includes built-in bridge completion, excitation, amplification, and filtering required for making quarter-bridge strain-gage measurements.
Visualizing test data
When testing large cranes under potentially dangerous loading conditions, the ability to visualize and interpret the data in real time can prevent failures and make things less risky for personnel. This application employed a structural test environment called iTestSystem from ITM that included capabilities to process the data during acquisition.
Data storage and postprocessing
Test systems for compliance with safety standards must output data in a standard file format. Because ITM collected data in a standard file format, Manitowoc engineers could analyze data and verify test results using existing in-house software.
Shielding from the elements
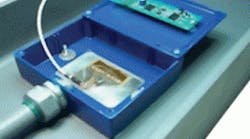
Most large equipment won’t fit in a test lab. It’s usually exposed to the elements. Each piece of instrumentation should sit in rugged, sealed enclosures. In ITM’s case, NEMA-4X enclosures protected instruments.
Safety standards
Engineers at ITM had to pay close attention to SAE J987, which outlines the methods for testing static loads on a lattice-boom crane. This let them supply Manitowoc with the test results to show compliance. SAE J987 dictates this particular test, but nearly every large piece of machinery has certain standards and codes.
Instrumentation and documentation
The safety standard usually includes the required instrumentation accuracy, calibration procedures, and documentation steps for the final report. But different manufacturers may have more detailed or stringent requirements. Failure to understand them can cost hours of test time.
