Design Guide on How to Miniaturize Medical Devices
There are several benefits from miniaturizing medical devices. For the patients, small and lighter ambulatory devices offer more comfort. For example, patch like pumps offer a low-profile device that can help deliver drugs to the patient. For surgeries, miniaturization means less wounds, lower infection risk, and shorter stays in hospitals. The next generation of surgical robots and surgery tools will be smaller and lightweight. On implantable devices, further miniaturization will lead to less invasive integration such as a miniature heart support pump.
Designing a Micro Ambulatory Drug Pump
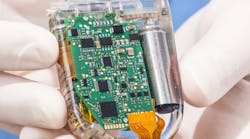
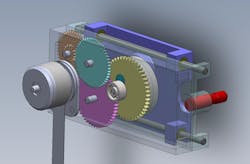
The following is an example of how maxon motors helped design a micro ambulator drug pump. This small pump drive based on a disposable double chamber pump. By oscillating a slat along the x axis, two pistons are pumping while switching two valves at the same time. maxon co-developed the drive technology and the mechanical structure of the ambulatory pump. The requirements for the device are minimal footprint and envelope, high torques, low elasticity, precision in positioning, and low noise. The unit is designed to be reusable and must undergo sterilization and cleaning processes.
When you design smaller devices, use the “inside out” concept design. With all developments, the starting point is very important. Understanding the use case precisely and extracting (see Meghan Thorne, Medrobotis 2017) the requirements is necessary. Learning is part of the development process—expect changes to the requirements. In the development of a miniaturized medical device the following step is important:
- Generate a strong mathematical model—this mathematical model represents the outside in.
- The mathematical model represents the outside input parameters and transfer them to your inside design.
- Feasibility of changes on parameters will be much easier.
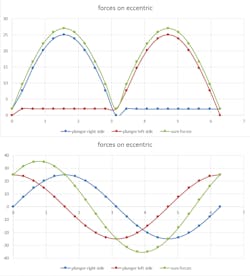
The disposable pump need on the two plungers is a changing force and for retracting a continuous force. The eccentric transfers these continuous rising forces into a sinusoidal torque form.
The disposable pump need on the two plungers is a changing force and for retracting a continuous force. The eccentric transfers these continuous rising forces into a sinusoidal torque form. The peek axial force is at about 25 N. An estimation on friction and load from switching of the valves is about 2 N.
Step 1: Mathematical Models
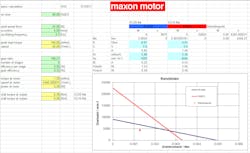
Generating a strong mathematical model help transfer functions from the requirements to the technology used in the device.
Generating a mathematical model helps to evaluate, if applicable, the transfer functions from the requirements to the technology you plan to use. Separate functions and solve them independently. Be sure to identify critical parameters and work with safety factors. For the micro ambulatory drug pump, the drive parameter is the pump force. The selected motor technology need to be overloaded. Understanding the duty cycle, show the RMS value of the required power is at 50%.
Step 2: Technologies
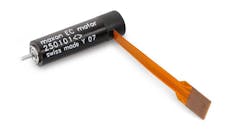
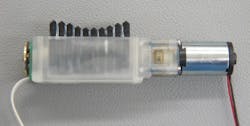
Choosing the appropriate technology, like the EC maxon motor above, is done after finishing your mathematical models.
If you feel comfortable with your mathematical model, step two in the development process can follow. Assess which technology to use for which function. This step is iterative with your mathematical model. Every new technology you plan to use is a risk factor that needs to be addressed. Technologies you should take into consideration:
- Miniature motors with rear earth magnets (high power density)
- Epicyclical gearboxes (high power density)
- Ceramics (sintered and CIM)
- Integration of encoders on outputs (get rid of nonlinearities)
- Micro injection molding (get elasticity where needed)
- Metal injection molding and sintering
- Stamping and forming
Step 3: Design Simulation and Build
The use of FEM tools checks for major parameters and optimization possibilities.
Step 3 in the development process is to build up your mechanical model from the inside out. This involves modeling your design with computer-aided design software and using the technology pieces you selected. This step is again iterative with your mathematical model. If necessary, use FEM tools to check for major parameters and optimization. It is also advisable to build up your risk analysis in parallel.
CAD models are implemented to design virtual models of the device once the technology products have been chosen.
Note that tolerances do not decrease in the same ratio as the parts do. Use elasticity instead of tight tolerances and assembly processes that are tolerant to relatively large tolerances. Existing assembly technologies used should have verified capabilities and separate functions wherever possible. This can generate more parts, but gives you the opportunity to solve problems. independently and make the risk manageable. Be sure to use production technologies that fit to the parts size. The following is an example of a milling operation for the appropriate size of the medical device.
--Turn a 1mm shaft on a lathe
--High grade of steel with low cutting depth
--Cutting speed vk90m/min (these is normally to slow)
--The math:
Step 4: Prototypes
Prototypes are the final step in the process and should be verified to all critical parameters.
Step 4 in the development is to build prototypes as early as possible. Use your risk analysis, the critical requirements, and critical parameters from your math models to generate a verification plan for a proper build. Prototypes should be verified to all critical parameters. Once completed, share the porotypes and results with your customer and let them try the usability. Collect all results for a review and the next loop of optimization.
Step 5: Verification
The final step is to verify the parameters, the mathematical model, the functionality, the usability, and all processes with risks as early as possible. Check and document all assembly problems; adaptations you needed to make; and deviations from the planned geometry, function, or usability. Collect and review all data to be used as input for next iteration.
Miniaturization and Costs
To ensure the medical device is cost effective, build up a cost target bill of materials (BOM) for every component and a cost target route for every process. Here are some hints to keep costs low.
- Tolerances are expensive
- Smaller doesn’t mean cheaper
- Exotic processes are more cost driving than good known standardized processes
- Processes for volume applications are often much more cost effective
- Use processes for precision products that are miniaturized already. These include the clock industry, connectors, electromechanical relays, SMD technology, and optics.
Build up concomitant calculation and integrate the view for total costs of ownership. The deviation from target costs and reached costs gives you the scope of actions you still need to take. Reaching cost targets sometimes means increasing the risk. To avoid any potentially hazardous situations, be sure to always use the risk analysis in parallel.
