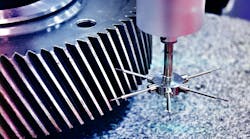
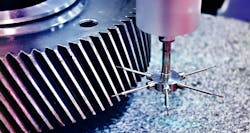
When it comes to creating miniature parts, innovative cutting and machining processes continually make more intricate features and precise geometries possible. Although advanced machining can create small parts with previously unattainable features and shapes, the systems and equipment used to measure them must keep pace.
Small-scale manufacturing irregularities may not affect larger parts, but they may present major issues for micro-sized parts. Small part sizes also bring measurement challenges. A part design may have, depending on how it will be used, intricate shapes as well as micro-sized features or hole geometries. The advanced machining tools that make it all possible have impressive capabilities. For example, a manufacturer with advanced machining capabilities can:
- Process a thin-walled product with a thickness of 0.1 mm and roundness of 0.01 mm or less.
- Create parts with outer diameters smaller than Ø160 to strict geometric tolerances.
- Cut parts to a geometric tolerance as low as 0.002 mm and surface roughness of under 0.6S.
- Achieve hole dimension tolerances down to ±5 μm or less.
- Specialize in ultra-fine processing of 1 mm or less.
For manufacturing technology progresses to deliver smaller parts with more sophisticated features and geometries, it pays to work with a fabricator that uses leading-edge metrology systems and equipment. This is especially true if the complex part is intended for critical applications like medical devices and instruments. These challenging part measurement elements demand top-notch metrology expertise and capability.
Accurate Clearance Measurements
Precision machining shops often encounter assemblies in which the constituent parts must fit into a space with virtually no clearance, such as when a shaft and hole have the same diameter. That means the tolerance—the maximum permissible variance between dimensions—can be as low as thousandths of a millimeter.
One such assembly involved a spool with an outer diameter of φ8 (0.000/−0.002) and a sleeve inner diameter of φ8 (+0.002/0.000). With such a tight clearance accuracy requirement, AOMI Precision employed an air micrometer and a CNC roundness measuring machine to achieve a proper fit. The air micrometer—which requires extensive operator training and meticulous calibration—injects a fixed amount of air and converts the returned air volume into electrical signals, providing dimensional measurements with sub-micron-level accuracy.
This contactless measurement method is well-suited for inspecting the surfaces of critical devices such as hemolytic pumps. This machine provides a rotational accuracy of 0.015 + 0.0003 μm per millimeter to measure the inner and outer diameter of a workpiece with high repeatability. It can also measure the straightness, parallelism and taper angle of a tapered surface. To ensure uniform measurements, the test equipment used to inspect the assembly is kept in a constant temperature room at all times (20 ± 0.5 ̊C, 50% ± 5%).
Measuring Surface Roughness
If there’s a potential problem during the machining process, the part’s surface finish is likely to provide an early clue. Changes to the roughness or texture of the surface—sometimes called “chatter”—can indicate tool wear, unexpected or improper tool speeds or temperatures. For these reasons, surface measurement is an essential step to ensuring part quality. Many parts have holes that are too difficult to access using traditional surface roughness measuring devices, so a non-contact measuring approach is necessary.
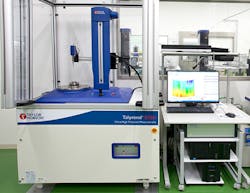
For example, AOMI employs a high-speed, non-contact 3D optical profiler. Its 1,024 × 1,024-pixel array provides a large field of view, and its data specifications include 0.1Å rms resolution, <0.2Å rms repeatability and 0.1% step height repeatability.
Using this scanner, a custom part with a hole-bottom surface roughness of Rzmax0.4 Wz0.3 and hole side surface of φ12.917 mm was measured. The hole depth was 43 mm—out of reach for most surface roughness measuring devices.
Comprehensive Hole Measurements
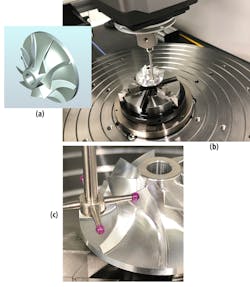
Another obstacle to accurate hole measurement is identifying differences between the measured value of a measurement point and the design values specified in the CAD data. Coordinate measuring machines can visually check the error of each measured value obtained to evaluate flatness, roundness and cylindricity in order to examine the unevenness of the plane at a glance. The machines also should include a function to evaluate free-form surfaces.
Not all machining companies have the experience and capabilities to apply advanced metrology when measuring parts. When selecting a precision machining partner, here are some of the things you should look for:
- High-end inspection equipment. A full-service precision machining shop will have a comprehensive roster of high-accuracy, high-precision CMMs to measure various geometric points on a part in real time, along with CNC roundness and concentric shape instruments, non-contact and optical measurement instruments, contour shape measurement systems and a wide range of measurement probes.
- Temperature-controlled inspection facility. Environmental conditions can have an influence on the dimensions of the part being measured as well as the precision and accuracy of measurement instruments themselves. To ensure repeatable measurements, inspections must be conducted in a room in which the temperature is continuously controlled at a high level.
- Quality standards. Approvals and certifications are another indicator of a machining company that delivers high-quality products. Be sure to look for a company that carries an ISO 9001:2015 certification. ISO 9001:2015 is a quality management system for companies with demonstrated ability to consistently meet customer and regulatory requirements. A similar certification—ISO 13485—covers quality management systems for medical devices and related services. Medical customers should also ask about a company’s license for medical device manufacturing.
Measure it Before Making it
As precision cutting and machining processes create smaller and more sophisticated parts for medical and other critical devices, micro-size dimensions and tolerances are pushing the limits of traditional measurement instruments. If a part manufacturer can’t measure the part, they can’t make the part. In order to be sure your miniature part can be manufactured with uniform and consistent quality, select a precision machining partner with robust and top-quality metrology capabilities.
Tsuyoshi Aomi is chairman and CEO of Aomi Precision.


