Everything you need to know about sizing and applying clutches and brakes
GENERAL SIZING PROCEDURES
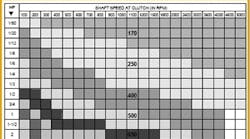
Clutches and brakes are sized based on shaft speed and the horsepower of the motor to which they attach. Most manufacturers provide selection charts that map out products as a function of horsepower and speed; torque is built in to the data as are relevant service factors.
Once you know the size, the choice boils down to mounting convenience. Most manufacturers offer several mounting styles to accommodate a wide range of preferences. Typical choices include in-line or parallel-shaft mounting, factory assembled (packaged) or assemble-on-site, and moderate or heavy duty design, which depends on how much vibration or shock is in the system.
COMMON APPLICATIONS
Clutch and brake applications are extremely varied. A general rule of thumb is that clutches connect the motor to the load, while brakes function more independently to stop, hold, or slow the load. Anywhere a machine needs to stop a load while allowing the motor to continue to run is a good place for a clutch/brake. Sorting, packaging, indexing, and conveying equipment are common clutch/brake applications.
Clutches and brakes come in many sizes and shapes to meet all sorts of applications. Units commonly range from 1.2 in. in diameter (offering 5 lb-in. of torque) to 15 in. in diameter at 1,350 lb-ft of torque. A typical application, say on a bread conveyor, might involve a C-face module used with a motor and reducer to index the loaves. In another application, say in mail sorting, a footmounted clutch/brake may be used to provide feed control.
INSTALLATION AND TROUBLESHOOTING
The most important installation tip is to read the manual. Even if you've designed with a particular component in the past, check the literature because something may have changed. Most product manuals will give you all the information you need to know, including tolerances, mounting steps, and installation considerations.
Troubleshooting a unit that's already installed, on the other hand, requires a little more creativity. Start at the beginning of the process and work forward one component at a time. A good rule of thumb is to look at the simple things first. Blown fuses, loose wires, or loose couplings, for example, can be quickly located and resolved. Have sketches of the electrical connections and mechanical components handy because they can be useful tools.
For more involved problems, most manufacturers provide an "800" number for technical support. When you call, have all your facts in order. The technicians may be experts on their products, but you are their eyes and ears. Having complete and accurate information on part numbers, application variables, and symptoms will speed up and improve the process. If labels are missing or damaged, at least record the physical features of the unit, including dimensions, appearance, and color.
FAILURE MODES
Under normal circumstances, clutches and brakes wear out gradually over time. You can tell a unit is wearing out when it doesn't accelerate or stop the load as quickly as it used to.
On rapid cycling equipment (100+ cpm), brakes that once stopped accurately will begin to drift slightly, and if you pay close attention, you'll see the drift gradually worsen with time. On slow cycling applications, the evidence of wear doesn't become apparent as quickly, but it's there. In either case, replacing the two mating friction faces will return the clutch or brake to its original performance.
Other modes of failure are generally the result of misapplication or improper installation. Under-sized units, for example, may fail prematurely because of accelerated wear. Improper installation, on the other hand, can increase noise, reduce torque, and cause aggressive wearing, especially to hubs and splines.
This month's handy tips are brought to you by: Greg Cober of Warner Electric, South Beloit, Ill. Greg is technical support and training manager and can be reached at (815) 389-6423 or [email protected].
