Download this article as a .PDF
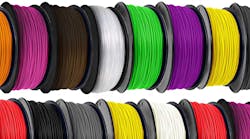
It’s inevitable: Unless you only 3D print single objects, sooner or later you are likely going to have to connect several printed pieces together. Bonding those materials together is an easy endeavor and has many benefits, the most obvious of which being the ability to create objects that are larger than the print bed of most desktop machines—such as this StarCraft Battlecruiser designed by Sam Fenimore or this massive piece of artwork from ProjectEgg. While there are many different materials used in 3D printing, in this guide, we will focus on the most commonly used filaments found in the thermoplastic family: ABS, PLA, Nylon, and PETG.
Regardless of object size, it’s good practice to know which methods of bonding can be employed using thermoplastic resin and how to avoid the pitfalls associated with using the wrong approach (including deformation and, in some cases, “burning” the material). Nobody wants to waste both time and money by damaging your projects. With that in mind, below are several methods of bonding designed to connect thermoplastic objects together.
Glues
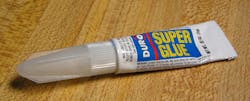
Using glues to connect thermoplastic resin is probably the easiest—and certainly, the fastest—method to employ, with the most prevalent being cyanoacrylate (aka Super Glue). It should be noted that good ventilation in the workroom is needed when working with these types of glues due to the solvents they are mixed with. This type of glue should not be used with multicolor prints unless the resins contain cyanoacrylate, as it tends to “burn” or degrade the dye over time. Undyed resins are not affected, so this type of glue works well here.
Epoxy is another popular option that can be utilized and won't react to dyed resins, making it the perfect choice for multicolored prints. Epoxy is stronger than Super Glue, though it takes longer to cure. As a result, the pieces need to be clamped together during the drying process, which can take hours or even a day, depending on how much is used.
Finally, neoprene glue can also be used to cement pieces together and offers better flexibility over the others. However, it’s not as strong and isn’t colorless, meaning you could see it coming out of the seam if you use too much. It also takes longer to dry than the others, but can be used on any resin without any side effects.
Solvents
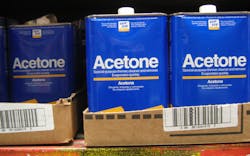
Using solvents such as acetone to bond thermoplastic together is perhaps the toughest option in this list, as you’re chemically “welding” or melting the plastic together. The result, though, is a stronger and near-seamless bond that’s structurally solid. Again, ventilation is important when using chemicals; if you’re working in an enclosed area use a respirator and protective clothing. The process of bonding using acetone is very simple. Use a natural brush (nothing plastic), cotton swab, or rag to apply the solvent to both pieces and clamp together to dry, which happens in a few minutes.
You don’t need much solvent for the process. Overuse can warp and even disintegrate the parts, so caution is advised. A great trick for bonding flat pieces together is to take a piece of glass (such as a window), apply a few drops of solvent on it, and then place the printed pieces on it and clamp them together. The glass won't melt, and the pieces will come off clean when fused. It’s important to note that solvent welding works well with ABS resin only, although some have used it with PLA and other materials with no ill effects. Caution is advised, however; it’s best to test on the material beforehand just to make sure.
Side note: Dipping 3D prints in acetone smooths out the surface of the print. I don’t do that very often, but the results are pretty professional looking.
Heat Welding
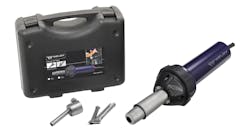
Hot-air welding is another popular option for bonding thermoplastic resin together and functions along the same lines as an extruder. Think of it like Mig welding pieces of metal together, only instead of wire, your using plastic. Most hot-air welding tools come with different sized adapters that allow you to swap-out based on the seam location. This makes for an easy weld, which is done by feeding the resin material and melting it as you draw it down the seam. This creates a bond that is stronger than any other method used.
It’s also fast, cheap and ready to go as soon as it’s cool to the touch. What’s more, you can use it on any thermoplastic material (even multicolored resins) with no ill effects. Like some of the others listed here, there are drawbacks of using this method, as it’s not practical for working with thin parts. It also requires some skill to be effective, especially with curved and hard-to-reach seams.
Another option you may want to consider is ultrasonic spot welding, which uses localized sound waves to melt plastic. This actually works better than the heat method and produces a stronger bond than any of the other methods. Unfortunately, the cost of these machines can run in the thousands of dollars, making it out of reach for most home users.
Friction Welding
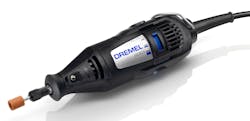
Friction welding is an ingenious solution to bonding plastic-based objects together and works similar to heat welding, only you’re using friction instead of air. In this case, you will need a rotary tool, something most makers and hobbyists have in their toolboxes. The process here is easy to employ and requires you to insert the spool material (ideally the same as the printed parts) into the rotary tool head, spin it up to speed, and touch it to the material you want to be bonded.
There are several techniques you can use depending on the area you want to weld, such as pulling it at an angle along a seam; orbiting it in circles like Mig welding for larger areas; or simply push/pull motion, perfect for deep or chasm seams. This method also requires some skill, but you can always sand the seam to make it uniform if too much material is applied.
3D Printing Pen
One of the arguably better solutions involves using a 3D printing pen to bond thermoplastic materials together. Think of it like a handheld extruder where the melted material of choice is extruded into/onto the object, forming a near-perfect bond that can even be color-matched. Most 3D pens are relatively inexpensive and easy to use. Although they do require a bit of skill to master, its nothing a few hours of learning won’t fix, and any extra material can easily be sanded away.
Like any tool, though, you do get what you pay for, and 3D pens are no different. There are several on the market that are great for this option, and at most will cost you a few hundred bucks and come highly recommended. These include the Lix 3D Pen, 3DSimo Mini, and the Lay3r 3D Pen.
Fasteners
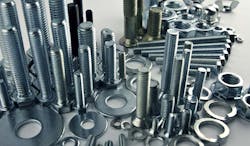
While technically not a bonding option, fasteners can be used to join 3D printed parts together if you have no other alternatives. Screws, nuts/bolts, and rivets are just some of the options that can connect 3D printed pieces together. In fact, you could also design the pieces so that the fasteners are incorporated into the object as its being printed, which can then be connected once finished.
There are many options when it comes to bonding thermoplastic 3D printed objects together. Most were produced by an ingenious community of makers and hobbyists who underwent countless hours of trial and error to find what works and what doesn’t. What works for one material may not work for others, and in some cases, it may seem counterintuitive. All the same, if it works, it’s a job well done.
