3D Printing Tips and Techniques 5: Prosthetics—the True HMIs
The largest limitations with prosthetics are not technology, but fit. However, there is still a place for technological improvements. Many of us have read stories about low-cost ($50 or so) prostheses that are as good as or better than conventional prosthetics that cost thousands of dollars. However, very few of these low-cost devices are actually being used regularly by amputees, but are instead promising prototypes.
For this reason, I take issue with people who try to compare these device and make claims about their pricing. You can’t compare the price on a prototype to a functioning prosthetic being sold on the market. There are a lot of factors that go into the price of a prosthesis that are not accounted for in product itself. Comparing the manufacturing cost of these prototypes to the price that is charged to an insurance company for a prosthetic that has been Ok’d by the United States health system is not comparing apples to apples. Additionally, most of these 3D printed prototypes have not fit to the level that is required to insure comfort for long term use.
There are two factors that are more important in prosthetic design than technological limitations. One is the medical criteria for the design. This is why conventional prostheses are designed under direction from a physician and based on well-researched standards of practice. The other factor is the socket design. The socket is the interface between the amputee’s residual limb and prosthetic. The fit of the socket is the most crucial part and requires significant experience and biomechanical understanding to design. If the socket is designed poorly, the prosthetic will be uncomfortable and not achieve the appropriate level of function.
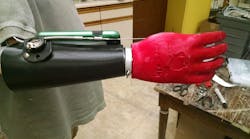
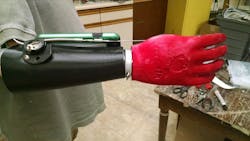
I have found that most 3D-printed designs have overlooked socket design. Frequently, the amputee interface is a uniform half-shell shape with a Velcro strap. Holding positions on e-Nable’s advisory board, I tell designers to focus on the socket more than spending their time working on the terminal device, which is that hand portion of the prosthetic arm. With that said, there are some things that an experience prosthetist can learn from the makers of these 3D printed devices. From these makers I have learned that:
- Lightweight designs are important. In my field, we are accustomed to building devices strong enough to go to war. But if the user is not going to war, then the devices are overbuilt. We need to adopt designs that are lightweight, but strong for the user.
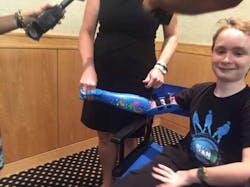
- In upper-extremity prosthetics, aesthetics are extremely important and sometimes more important than function. The e-nable community has designed a device called the Raptor. The thumb is angled the wrong direction for a good grip pattern, but hundreds of kids around the world have been happy to receive them because they look really cool.
- There is a need for development in lower-cost devices. Myoelectric devices with sophisticated microprocessors are able to do a lot of functions, but this technology is not always available to amputees. Even if it is available, it may not be the best fit. Growing children are an excellent example of this. We need to jumpstart our research on less expensive devices and improve them. Body-powered prosthetics have been used for hundreds of years. However, not much has changed in the last 30 years. This is an area in need of development.
Improving 3D-Printed Devices
There is a great need for low-cost prosthetics in the world. In these places a prosthesis, even when fit by people with limited experience, are better than no prosthesis. This is the niche for the 3D-printed prosthetic movement.
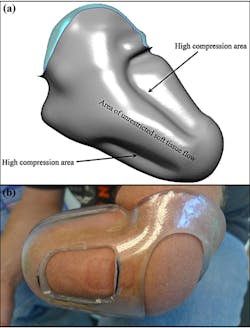
A suggestion I have for a person working on print prostheses is to focus more attention on the sockets. The conventional method for making a socket is to take a cast or digital scan of the patient’s residual limb. Then, modify contours of this model to apply pressures on the soft tissue, and relieve pressure from sensitive areas (i.e., bony prominences, fragile skin, and sensitive nerves (Of course, this description is just an overview. The specific details are complex, and more information can be found here).
One way to make a better-fitting socket is to use flexible materials in this interface like most conventional prostheses do. I am familiar with rigid printable materials like PLA, ABS, and nylon. However, I would not build a socket out of any of these. At Create Prosthetic, we design almost exclusively with flexible material called Flexy Fit.Thermal plastic elastomers (TPUs), such as, Ninjaflex, Filaflex, etc., work well, too. These materials are all urethane-based materials, which are a common material for prosthetic liners and flexible inner sockets. Flexible materials can help dissipate forces on the prosthetic over a larger surface area of the residual limb, making it more comfortable to wear regularly and for longer periods of time.
There are some designers of 3D-printed prosthetics who are already using flexible materials in their designs. Steve Wood of Gyrobot and I designed a partial hand prosthesis made from Filaflex. Open Bionics Arm uses Ninjaflex and Semiflex in its arms, and Life Prints arms use Filaflex in their devices.
I think rigid materials have a lot of value in prototyping of components, which are later replaced with ones fabricated from carbon fiber and milled titanium. Additionally, in the developing world, expensive materials like carbon fiber may not be available, so there is a need for designs that are based on low-cost 3D-printed materials.
Jeff Erenstone is CEO of Create Prosthetics.


