This file type includes high resolution graphics and schematics when applicable.
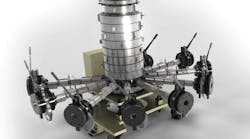
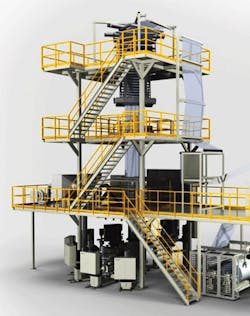
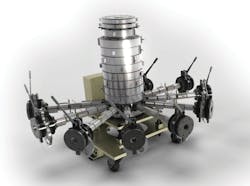
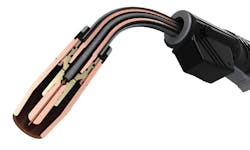
Manufacturers increasingly find it advantageous to render computer-aided design (CAD) models of engineered parts and assemblies into technical animations and photo-realistic movies. These technical animations are becoming required tools for companies that build complex machines and systems or that need to explain a detailed process or motion-control concept to customers, partners, board members, investors, or the C-Suite.
It is important to understand the term “rendering,” which is basically the process of taking a computerized 3D model, such as a 3D CAD description, and translating it into a lifelike 2D image. To render an image, the artist (yes, an artist) uses lighting and perspective, words, shadows, parts, and colors to give context to the rendering and its subsequent frames. The artist also weaves each frame into a movie or an animation.
Marketers and communicators have long understood the value of technical 3D animations. It is only recently that technology primarily coming out of the film industry has put such animations within reach of the masses, thanks to the availability of software such as Maya, 3ds max, and Softimage. In particular, advances in computer-generated imagery (CGI) coming out of the film industry have improved workflow for all kinds of animations. What were once heavily modified and scripted computer programs have now evolved into off-the-shelf software. Without the R&D done in the entertainment field, we most likely wouldn't have the software to create technical animations and illustrate products today.
The off-the-shelf software used in industrial animations resembles that used in the film industry for animation. Technical animators just use it in a different way. The main difference is that software for film animation is based on polygonal 3D models (think video games) as opposed to the mathematical curves and data used in CAD software. However, on the finished rendered piece, the differences are not noticeable to the human eye. The primary advantage of the “Hollywood” software is its ability to produce photorealistic renderings and, of course, to provide a means of choreographing any motion one can imagine. Using the same tools as those for Toy Story or Shrek, industrial animators can create visually stunning graphics.
This file type includes high resolution graphics and schematics when applicable.
This file type includes high resolution graphics and schematics when applicable.
But don’t overlook MCAD. Much of the work involved in producing computer animation is in procuring and creating the necessary 3D models. Companies that employ 3D CAD already have this data available within their engineering departments. This is a huge step in keeping costs in check on an animation project.
Engineers might wonder whether they can handle an animation themselves without farming it out. Some CAD packages have canned animation software in which movements of an assembly can be choreographed on a timeline. But these features are basic and have their limitations (lack of photorealism and limited output formats, to name just two). An animation that only needs to show a range of motion — say, for a linkage in a design phase — could use canned animation in CAD software. However, specialized software is generally the way to go for wowing people at a trade-show booth or for creating high-quality marketing videos.
Setting up an animation
Animations can be created on a standard CAD workstation. The complexity of the subject matter determines the amount of horsepower necessary. For example, it takes less horsepower to animate a BIC pen coming apart compared to a full-blown, multithousand-part assembly-line animation.
There are two types of “horsepower” required. The first is necessary to choreograph and set up and keyframe the animation. This is analogous to the horsepower you would need for CAD work, and the key-frame software resembles CAD software. The keyframe animation can be visualized as wire-frame models you can orbit around while adjusting movements as you go along.
The other type of horsepower required is that used to convert each frame of the wire-frame view into the finished, photoreal version. The standard is 30 frames/sec of animation. This process is called “rendering” and consumes a lot of processing power. Some individual frames could take 15 min or more to render. To figure the total rendering time, multiply individual frame rendering time by 30 frames and 60 sec for each minute of animation. Clearly, rendering can be time consuming. These are unmanned computer hours, of course.
This file type includes high resolution graphics and schematics when applicable.
This file type includes high resolution graphics and schematics when applicable.
Professional animation houses use powerful server racks with multiple processors and RAM rather than disk storage. The rendering of a complex animation could take 24 to 48 hr with these facilities. For example, the 3deeit studio uses eight servers in a rack with eight processor cores/server.
Clearly, it is good to have an idea of the animation length and complexity before beginning a project like this. Sometimes it also helps to do some physical prototypes to make sure both the end user and the animator are on the same page.
Often, one of the first steps is to storyboard the animation, graphically organizing it in the form of illustrations or images displayed in sequence that helps visualize the animation. (Animations that are strictly technical may not require a storyboard, however.) A basic script is critical to nail down what is actually being animated. The objects that aren't moving obviously need less time and attention.
The next step is data collection, starting with the CAD files, usually in a STEP format. These are large datasets, and animators strive to ensure the information isn’t too detailed (eliminating such information as screws or screw threads, sensors, and so forth) for the final animation. All 3D models must be imported into the animation software and prepped (adding textures, materials, decals, and so forth). This process gets to be time-consuming when there could be several thousand parts in a large assembly line.
Other reference materials such as product specification sheets, pictures, sketches, video, print ads, and brochures help animators create an accurate final representation of the component or machine. Their first product is a basic colorized animation created to make sure the motion is correct, accurate, and to the end user’s liking. This step is necessary because the computational time necessary for final renderings is lengthy.
The final rendering begins once this first draft is approved. Then, computers create the photorealism, frame by frame. The final step is postproduction, where animators add titles, customer logos, and branding, and edit the rendered pieces into a final video file.
Movements and ancillary animation make the project more complicated. For instance, adding fluid animation into a hydraulic system adds complexity. The number of moving parts/linkages also boosts complexity because of the motion involved. Animations that must exhibit full photorealism also take a lot of rendering time and power, even for draft renderings.
One of the challenges in creating animations is to balance the level of photorealism with the project timeframe/budget. It's easy to go overboard and create a nice-looking still image. But we’ve seen end users who’ve gone into shock when they realize that rendering a whole animation this way will occupy a bank of servers for a week.
This file type includes high resolution graphics and schematics when applicable.
This file type includes high resolution graphics and schematics when applicable.
Another challenge is in keeping the final piece from going into information overload. Animators typically try to visually communicate the pre-determined concepts/points to be highlighted, with the least amount of callouts or text, or extraneous camera movements. Often, end users tend to request the addition of text overlays on the animation, eventually dragging out the overall video. This makes for a less interesting tradeshow presentation or YouTube demo.
One mistake often made during the conception of these projects is to constrain animations into a finite length. The animation should be as long as necessary to clearly communicate the desired message. Professional animators generally recommend steering away from artists quoting a “price per minute” for technical animations. Technical animations are based on complexity rather than finished overall length. Example: Compare the disassembly of a pen to a complete working robotic automation line. Both could occupy a 2-min animation. The pen animation is probably much less complicated than that for the automation line.
As with any engineering project, time management is important for animation work. It is probably smart to build in a few weeks of buffer time for animations that must be ready for a trade show. Depending on complexity, animation projects can take several weeks to complete. Scope creep is as challenging for animations as for building machines. Sometimes less is more. An animation artist can always add content later on.
Similarly, sometimes manufacturers wonder whether a product animation will reveal their intellectual property if they show too much detail. That was the case recently with the animation of an injection molding process. The mold itself was hidden but animation could still show how the plastic runs into the part. Animators can often make two versions of the animation if necessary. One version is for public use on a website, for example, and hides certain elements of the machine, system, or process. The other version is for trusted clients and usually never gets left with customers. It can show as much as the IP owner cares to disclose. The beauty of animations is that their creators can reveal as few or as many details as necessary.
This file type includes high resolution graphics and schematics when applicable.
