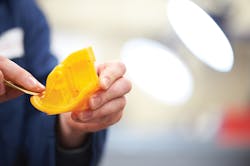
Many high-quality parts produced on 3D printers can be sanded by hand to eliminate layer lines and produce a smooth finish.
There’s a misconception that 3D printing cannot make the kind of smooth and polished parts available from traditional manufacturing technologies. But finishing techniques can address such concerns, and they are widely available. For example, RedEye, one of the world’s largest providers of 3D-printing services, offers finishing services for parts printed from fused-deposition modeling (FDM) and PolyJet machines.
“The ability to use each finishing technique depends largely on part geometry and the material. These two factors determine what type of aesthetics can be achieved, as well as a part’s function because different methods allow for different textures and appearances. Some methods are better for prototypes, display models, or end-use parts,” says Bill Camuel, project engineering supervisor at RedEye, Eden Prairie, Minn.
RedEye offers several finishing techniques, but the company usually gets requests for sanding, bead blasting, and a technique using vapor smoothing.
Sanding
Though FDM systems are engineered to produce high-quality parts right off the machine, the layer lines can be visible, and they often deter customers from using them in end-use applications where aesthetics are a priority. The sanding process alleviates the concern and can be used for display models, sales or concept samples, form-fit-function prototypes, or end-use parts.
The process of sanding is exactly as it sounds. FDM plastic parts can be sanded by hand or with belt sanders, like wood or automotive parts. Sanding is an inexpensive, effective, and proven method to reach a smooth finish. It is consistently the most widely used finishing technique for 3D-printed parts.
Sanding works on all but the tiniest parts. Parts can never be too large, but manually reaching small undercuts or drafts is difficult. Also, the process is relatively quick for standard-finish parts. Standard-finish parts from an FDM machine usually have stair-stepped surfaces. Sanding removes stair-stepping on a part roughly the size of a television remote in about 15 min. However, getting a part of the same size ready for paint takes as much as 2 hr because of additional steps like priming and drying time.
When parts must hit benchmarks for accuracy and durability, it’s important to keep in mind how much material sanding will remove. Removing too much could force adjustments in part design and wall thickness before printing. Benchmarks will also help determine which sanding technique to use — hand sanding or power sanding — and which tools to employ.
Bead Blasting
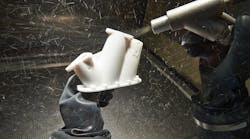
The second most-commonly used finishing process is bead blasting. Here, an operator holds a nozzle that sprays tiny beads of media at a part to remove layer lines. It’s quick, taking about 5 to 10 min to complete, and the process leaves products with a smooth finish that looks like a uniform matte finish.
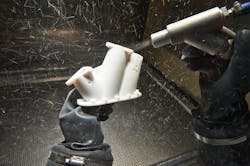
Bead blasting sprays tiny, plastic particles at a part inside a closed chamber to produce a smooth finish in about 5 to 10 min.
Bead blasting is flexible, as it works with most FDM materials. It also can be used on parts throughout their product development and manufacturing life cycle, from prototyping to production. The versatility comes from the media, typically small, plastic particles that are composed of finely reground thermoplastic particles. RedEye most commonly employs these plastic bead media, which are durable and offer an abrasiveness that ranges from mild to harsh, for spraying. Baking soda also works well because it’s not too aggressive, though it can be messier than plastic.
One of the limitations of bead blasting is part size. Because the process takes place in an enclosed chamber, the maximum part size is 24 × 32 × 32 in. And, given that parts are bead-blasted by hand, they are finished one at a time and, thus, cannot be mass finished.
Vapor Smoothing
Rounding out the top three is a finishing method called vapor smoothing. The part is dipped into a vapor tank containing liquid at the base that is brought to boiling point. The vapor rises and melts away about 2 µm of the part surface, leaving it smooth and shiny after only a few seconds. Once polished, the finished parts can withstand upwards of 100°F. Those who prefer a matte finish can bead blast the part after smoothing, which subdues the surface tension and camouflages layer lines.
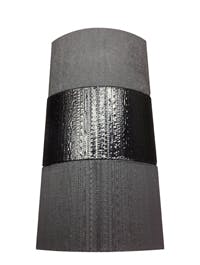
Finishes can vary based on the approach. From bottom to top, RedEye shows the finishes of raw FDM, Ready Part glossy, and Ready Part matte. Ready Part is the name of RedEyeâs vapor-smoothing process.
Because it provides an even surface finish, vapor smoothing is widely used in consumer, prototype, and medical applications. The method does not significantly affect part accuracy. And, when bead blasted, the matte finish makes the part ready for filming, coating, and plating layers. These coatings are typically applied to stronger, high-performance materials.
Unfortunately, like bead blasting, vapor smoothing presents some size restrictions. Because materials are dipped into a tank, the largest part size is 3 × 2 × 3 ft. Unlike sanding and bead blasting, vapor smoothing has material restrictions as well. Instead of accommodating the full spectrum of FDM materials, vapor smoothing can only service ABS and ABS-M30, which are common durable thermoplastics. These materials are economical and strong enough to perform much like the final product.


